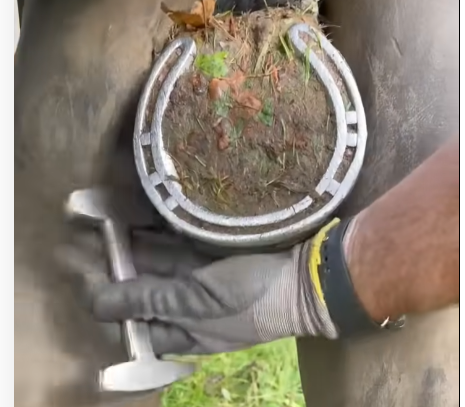
Removing horseshoes is an essential aspect of hoof care that every horse owner should understand. Whether you’re managing a retired show horse or a competitive athlete, regular shoe removal is necessary for maintaining hoof health and preventing potential issues. This article will guide you through the reasons for removing horseshoes, the tools needed, and the step-by-step process involved.
Why Remove Horseshoes?
Horseshoes are designed to protect the hooves, but they need to be replaced periodically—typically every 6 to 8 weeks—depending on the horse’s activity level and hoof growth. Here are some reasons to consider removing shoes:
- Hoof Health: Regular removal allows the farrier to inspect the hooves for signs of damage, thrush, or other issues that may not be visible when shoes are on.
- Natural Growth: Horses’ hooves continue to grow even when shod. Removing the shoes allows the hooves to expand and breathe, promoting healthy growth.
- Seasonal Changes: During certain seasons, such as summer, a horse may benefit from being barefoot to avoid overheating or excessive wear on soft ground.
- Rest and Recovery: If a horse is recovering from an injury or simply needs a break from work, removing the shoes can help facilitate a healthier hoof environment.
Tools Required
Before you begin, ensure you have the right tools on hand:
- Hoof Pick: For cleaning the hoof and removing debris.
- Nail Pullers: To remove the nails that hold the shoe in place.
- Clippers or Trimmers: For trimming the hoof if necessary.
- Rasp: To smooth the edges of the hoof after shoe removal.
- A Clean Work Area: Ensuring safety for both you and the horse.
The Step-by-Step Process
- Preparation: Start by securing the horse in a safe, calm environment. Use a halter and lead rope, and consider having a friend help to keep the horse steady. A cross-tie may also be useful.
- Clean the Hoof: Use the hoof pick to clean the sole, frog, and walls of the hoof. Remove any stones, dirt, or debris that could impede the shoe removal process.
- Assess the Shoe and Hoof: Examine the shoe for any signs of wear or damage. Look for cracks in the hoof that may need attention once the shoe is off.
- Remove the Nails: Starting from the toe and moving towards the heel, use the nail pullers to carefully lift the nails out of the hoof. Take your time; pulling too hard can cause discomfort.
- Loosen the Shoe: Once all nails are removed, gently tap the shoe with a hammer if it’s stuck. Be cautious not to injure the hoof. Gradually work the shoe off by wiggling it from side to side.
- Inspect the Hoof: With the shoe removed, examine the hoof for any issues. Look for cracks, bruising, or signs of thrush. If you notice anything concerning, consult a farrier or veterinarian.
- Trim and Smooth: If necessary, trim the hoof with clippers or trimmers to maintain its shape. Use a rasp to smooth out any rough edges and ensure a comfortable fit for any future shoes or for going barefoot.
- Post-Removal Care: After the shoe is removed, provide some hoof conditioner or ointment to help maintain moisture and promote healthy growth. Ensure that the horse is comfortable and free to move around without shoes.
Conclusion
Removing horseshoes is a vital part of equine care that contributes to the overall health and well-being of your horse. By understanding the reasons for shoe removal, using the right tools, and following the proper steps, you can ensure that the process is safe and beneficial for your equine companion. Regular hoof care, including shoe removal, promotes strong, healthy hooves, allowing your horse to thrive in any environment.
